01. OVERVIEW

Important

This feature is available from release 12.1.33 onwards.

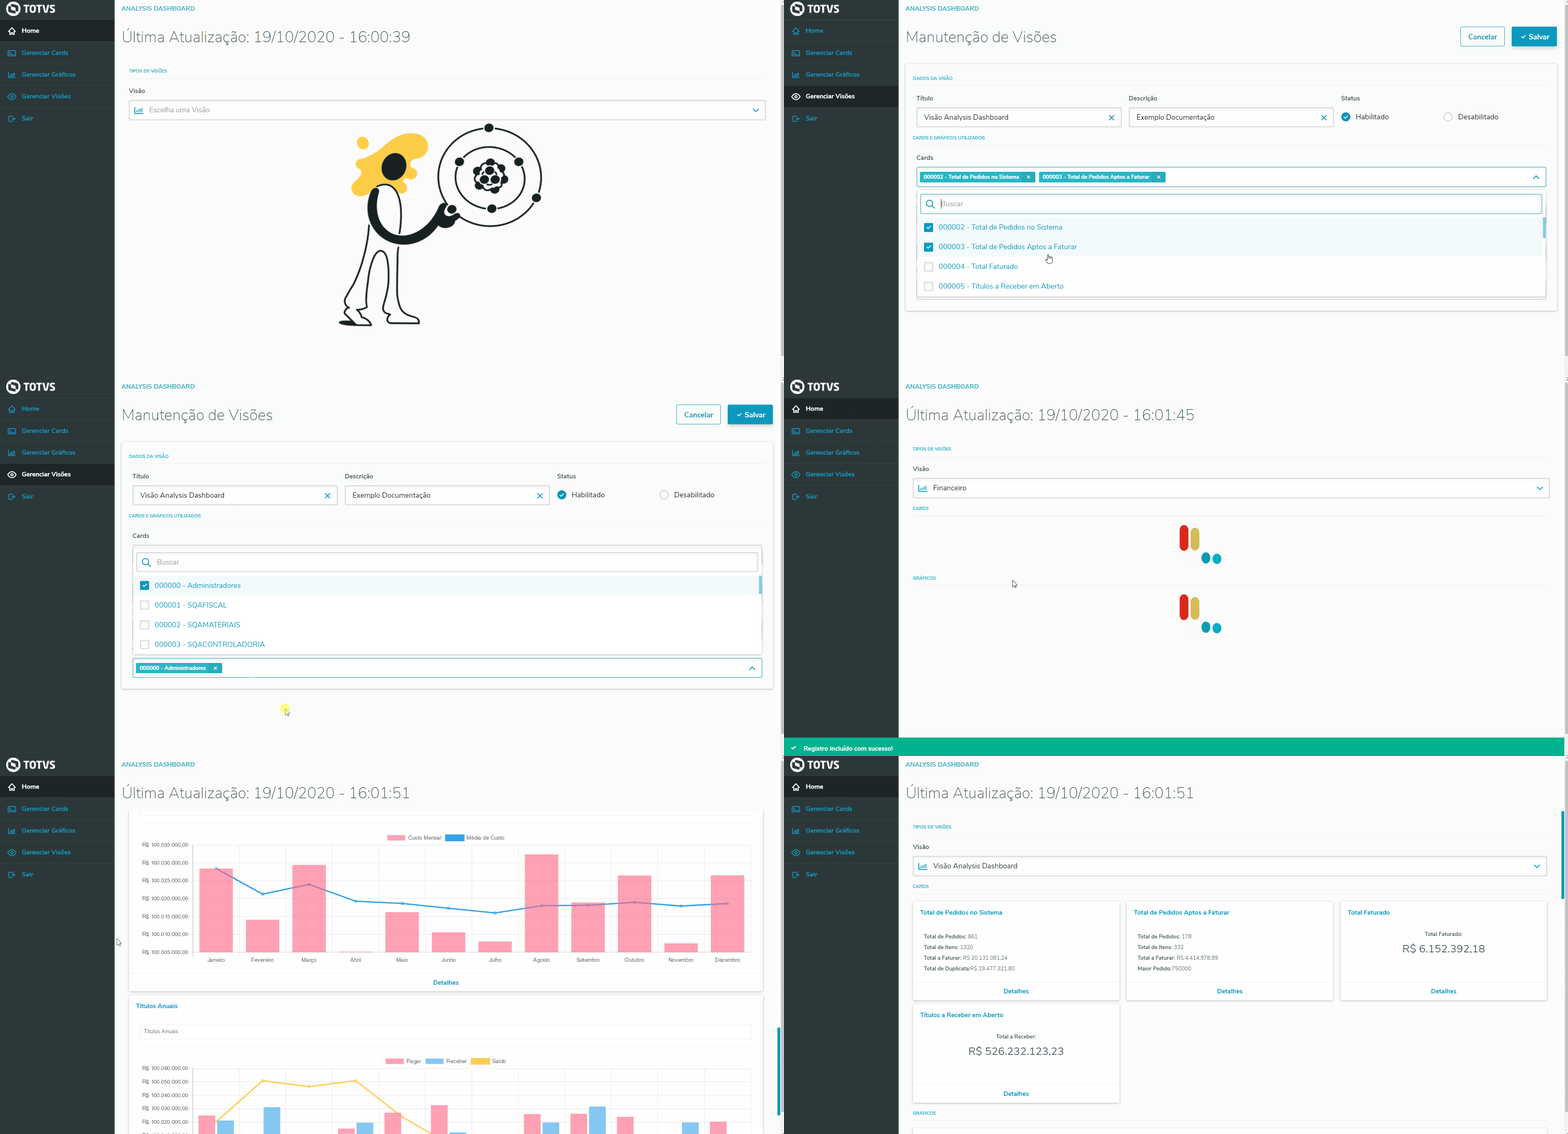
The menu View (Manage Views)  allows Addition, Editing, Deletion, Enabling and Disabling Views. When Adding or Editing a View, you can attribute the Cards and Charts created for a specific User or Group.

02. EXAMPLE OF USE

Practical example of the process using Protheus

To add a new View:

  1. Click the menu Manage Views.
  2. Click Add.
  3. Fill out the fields in the following sequence:

a) Title: Enter a title for the View.

b) Description: Enter a description for the View.

c) Status: Define whether the view is enabled or disabled for viewing.

d) Cards: Enter the cards to be displayed on the view.

e) Charts: Enter the charts to be displayed on the view.

f) Users: Enter the users to have access to the view.

g) Groups: Enter the groups to have access to the view.

h) Click Save to finish the operation.

i) To view the registered view, just click the Home menu and select the view desired:


To Edit a View:

  1. Click the menu Manage Views.
  2. Select the View you want to edit.
  3. Edit any data you want.
  4. Click Save to finish the operation:


To disable or enable a view:

  1. Click the menu Manage Views.
  2. Select the View you want to enable or disable.
  3. Click the icon in column View:


Captions:

Green Icon: Enabled

Red Icon: Disabled


To delete a View:

  1. Click the menu Manage Views.
  2. Select the View you want to delete.
  3. Click the trash icon to delete the View:
  4. Click Confirm to finish the operation:


To conduct a View search:

  1. Click the menu Manage Views.
  2. Enter the title of the View you want to filter.
  3. Example of search by View title:


To search Views:

  1. Click the menu Manage Views.
  2. Click Advanced Search.
  3. Enter the View you want to filter.
  4. Example of advanced search by View code:


Note: To remove the filter, just delete the item from the filter.


In Views maintenance you can manage the columns not displayed on the grid.

To manage columns, just click the Cog icon to select which columns to display, as shown below:


03. OTHER INFORMATION

  • None available.

04. RELATED TOPICS