Speaking of separate topic items...
Topics items are the content that comprises class topics. A separate topic item can only be viewed by the teacher, it is not displayed to the students. This item can be used, for example, to award a participating grade to students.
It is possible to deactivate or reactivate a separate topic item. When a topic item is deactivated or reactivated, the score of the active students, i.e., those who are still taking the subject, is recalculated. The score is recalculated whenever there is any change in the class topic structure. Inactive registrations are not affected. Inactive topic items are not considered in the calculation of grades. However, for the registrations that were completed prior to deactivation, they continue to be considered.
Understand!
Do you want to understand the weight of an item in the final grade of a topic? Go to Calculating topic grades for classes and learn all about it.
Create new separate new topic item
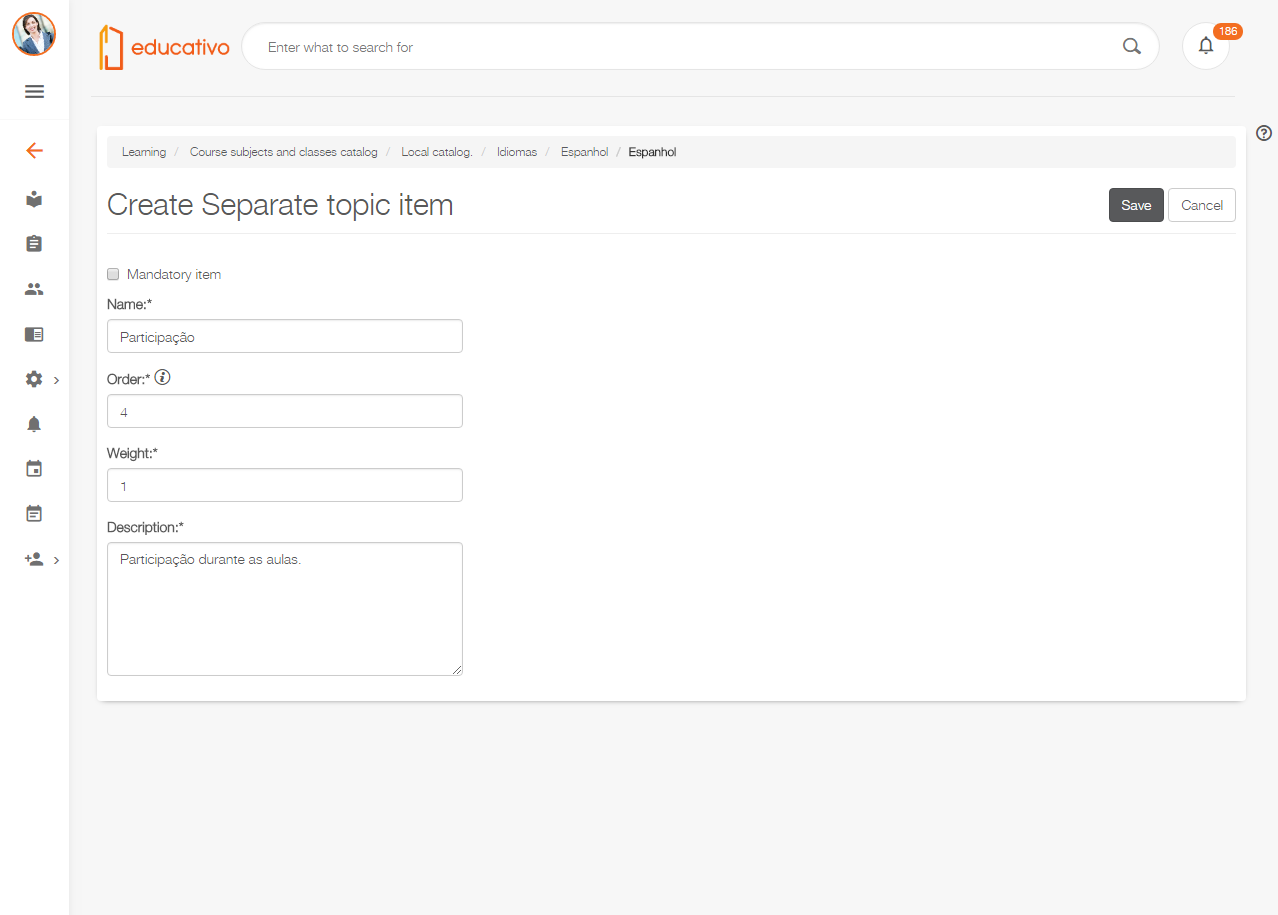
01. After clicking New topic item, Separate in the topic where the item will be created, enter the required information.
Required information:
Mandatory item
When checked, completing the separate topic item is mandatory.
Name
Identification name of the separate topic item.
Order
Order in which to display the separate item in the topic.
Weight
Weight of the separate item compared to other content that comprises the topic.
Description
Description of the separate topic item.
05. Click Save; or Cancel to quit creating the separate topic item.
Editing separate topic items
To edit a separate topic item, you are required to have, at least, modification permission on the class to which it belongs.
01. In the catalog, find and access the subject and the class to which the topic belongs.
02. In the Class topics and topic items area, find the topic whose item will be edited.
03. In the Topic items area, find the separate item to be edited.
04. Click the Edit icon, located in the upper-right corner of the table that corresponds to the separate topic item.
05. Change the information of your choice. For more details about the displayed fields, see the basic path.
06. Click Save; or Cancel to discard the changes made.
Copying separate topic items
To copy a separate topic item, you are required to have, at least, writing permission on the target topic class.
01. In the catalog, find and access the subject and the class to which the topic belongs.
02. In the Class topics and topic items area, find the topic whose item will be copied.
03. In the Topic items area, find the separate topic item to be copied.
04. Click the Copy/move icon, in the upper-right corner of the table that corresponds to the separate topic item.
05. In Item destination, click Search.
06. In the Target Items window, enter the name of the location to which the separate topic item will be copied.
07. On the displayed list, select the destination for the separate topic item copy.
08. Click Add and close the window.
09. Click Copy.
When clicking this option, a copy of the separate topic item is created in the set location.
Moving separate topic items
To move a separate topic item, you are required to have, at least, deletion permission on the class to which it belongs and modification permission on the class to which the target topic belongs.
01. In the catalog, find and access the subject and the class to which the topic belongs.
02. In the Class topics and topic items area, find the topic whose item will be moved.
03. In the Topic items area, find the separate topic item to be moved.
04. Click the Copy/move icon, in the upper-right corner of the table that corresponds to the separate topic item.
05. In Item destination, click Search.
06. In the Target Items window, enter the name of the location to which the separate topic item will be moved.
07. On the displayed list, select the location to which the separate topic item will be moved.
08. Click Add and close the window.
09. Click Move.
When clicking this option, the separate topic item is moved to the set location.
Deactivating separate topic items
To deactivate a separate topic item, you are required to have, at least, modification permission on the class to which it belongs.
01. In the catalog, find and access the subject and the class to which the topic belongs.
02. In the Class topics and topic items area, find the topic whose item will be deactivated.
03. In the Topic items area, find the separate topic item to be deactivated.
04. Click Deactivate, in the upper-right corner of the table that corresponds to the separate topic item.
05. In the pop-up message, click Yes to confirm deactivation of the separate topic item; or No to cancel the action.
Reactivating separate topic items
To reactivate a separate topic item, you are required to have, at least, modification permission on the class to which it belongs.
01. In the catalog, find and access the subject and the class to which the topic belongs.
02. In the Class topics and topic items area, find the topic whose item will be reactivated.
03. In the Topic items area, find the separate topic item to be reactivated.
04. Click the Activate icon, in the upper-right corner of the table that corresponds to the separate topic item.
05. In the pop-up message, click Ok to confirm reactivation of the separate topic item; or No to cancel the action.
Deleting separate topic items
To delete a separate topic item, you are required to have, at least, deletion permission on the class to which it belongs.
01. In the catalog, find and access the subject and the class to which the topic belongs.
02. In the Class topics and topic items area, find the topic whose item will be deleted.
03. In the Topic items area, find the separate topic item to be deleted.
04. Click the Delete icon, in the upper-right corner of the table that corresponds to the separate topic item.
05. In the pop-up message, click Yes to confirm deletion of the topic item; or No to cancel the action.
Attention!
This documentation is valid as of the 1.6.2 update. Previous updates may contain different information than what you see on your platform.
Visão Geral
Import HTML Content
Conteúdo das Ferramentas
Tarefas