Contents
Objective
The objective of this guide is to present the procedures required to dispatch the workflow processes through Fluig Studio.
Workflow process dispatch through the Fluig plug-in in TDS
The dispatch of a workflow process in Fluig through the Fluig BPM plug-in in TOTVS Developer Studio – TDS.
The project structure for a Fluig workflow process Fluig is shown below:
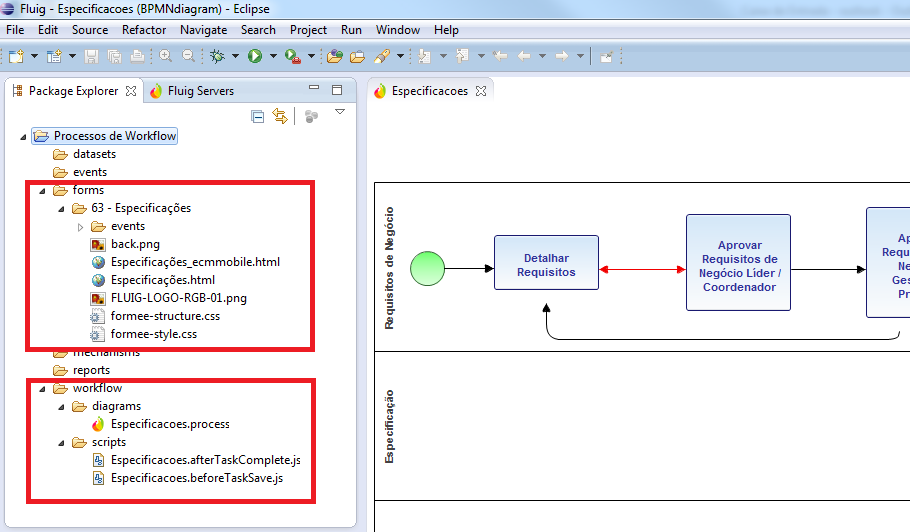
Files with the definition of the form and its attachments - e.g., CSS files and images - are stored in a specific folder. In the figure above, the form files are in folder “63 - Especificações”, which is the Fluig location where the process form was posted. The folder is created automatically with the same name given to the workflow process form.
Lastly, the “workflow” folder contains all the files that compose the structure of processes. This folder contains the “.process”, which is the definition of the process, and the “scripts” folder. The “scripts” folder stores the implementation of all customization events created for the process.
The workflow process dispatch is performed by Studio. To choose this procedure, simply select the project and right-click to select “Export”, as shown in the figure below:

In the tree, expand the item “General” and select “Archive File”, as shown in the figure below:

Lastly, enter the full path and file name to be generated for the process file. To create a ZIP file, check if the option “Save in zip format” is selected.
Workflow process import through the Fluig plug-in in TDS
Workflow processes in the Fluig process editor are imported through the Fluig plug-in in TDS.
To import a workflow process file, open the TDS and select the “Package Explorer” view. In “Package Explore ”, right click on the desktop of this view and select “Import”, as shown in the figure below:

In the import screen, close the Fluig node, then select the node General > Existing Project into Workspace” as shown in the figure below:

Lastly, select “Select archive file” and click on “Browser”. Navigate to the zip file that contains the process definition to be imported and conclude the Wizard as shown in the screen below:

To enable the workflow process for configuration and execution in Fluig, we suggest following the training path for the product, available at TOTVS academy.
Visão Geral
Import HTML Content
Conteúdo das Ferramentas
Tarefas