Contents

Overview
Fluig Identity user accounts can be synchronized with Microsoft Active Directory, making it much more efficient to manage user accounts. The instructions cover fluig Identity SmartSync and the process to configure synchronization with one or more Active Directory servers.
Requirements
- .NET Framework version 4.5 or higher installed on the server.
Obtain SmartSync installer
Download SmartSync installer through the link available on fluig Identity. It must be installed on a server that can ping any Active Directory server to be connected with your company's context on fluig Identity. SmartSync can be installed on the same server as Active Directory, but that is not mandatory.
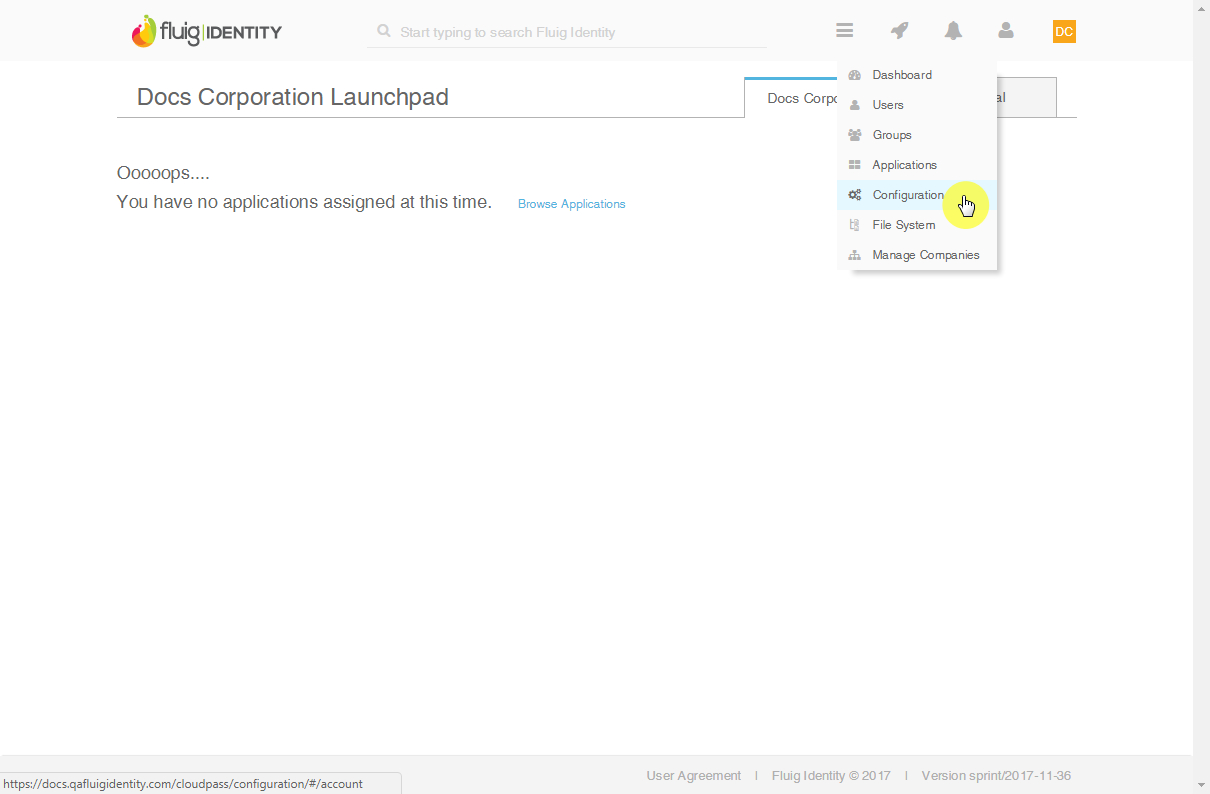
- Go to the Main Menu and select Configuration.
|
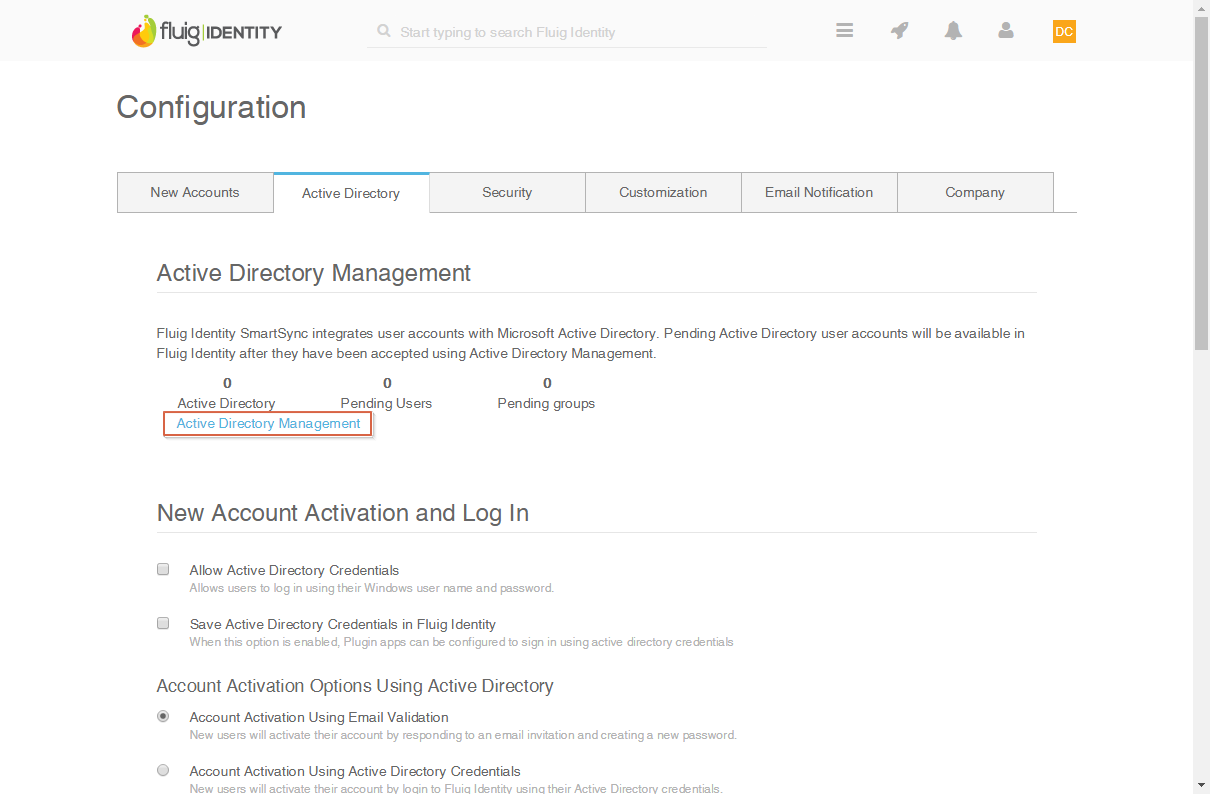
- Select the Active Directory tab.
- Click on the link Active Directory Management.
|
- Click Download SmartSync to download it.

|
|
Install SmartSync on a Windows Server 
Run the SmartSync installer and then access it from the shortcut created on the desktop.

SmartSync Installer for Windows
Associate new Active Directory
Before configuring Active Directory on Smart Sync, associate Active Directory on fluig Identity.
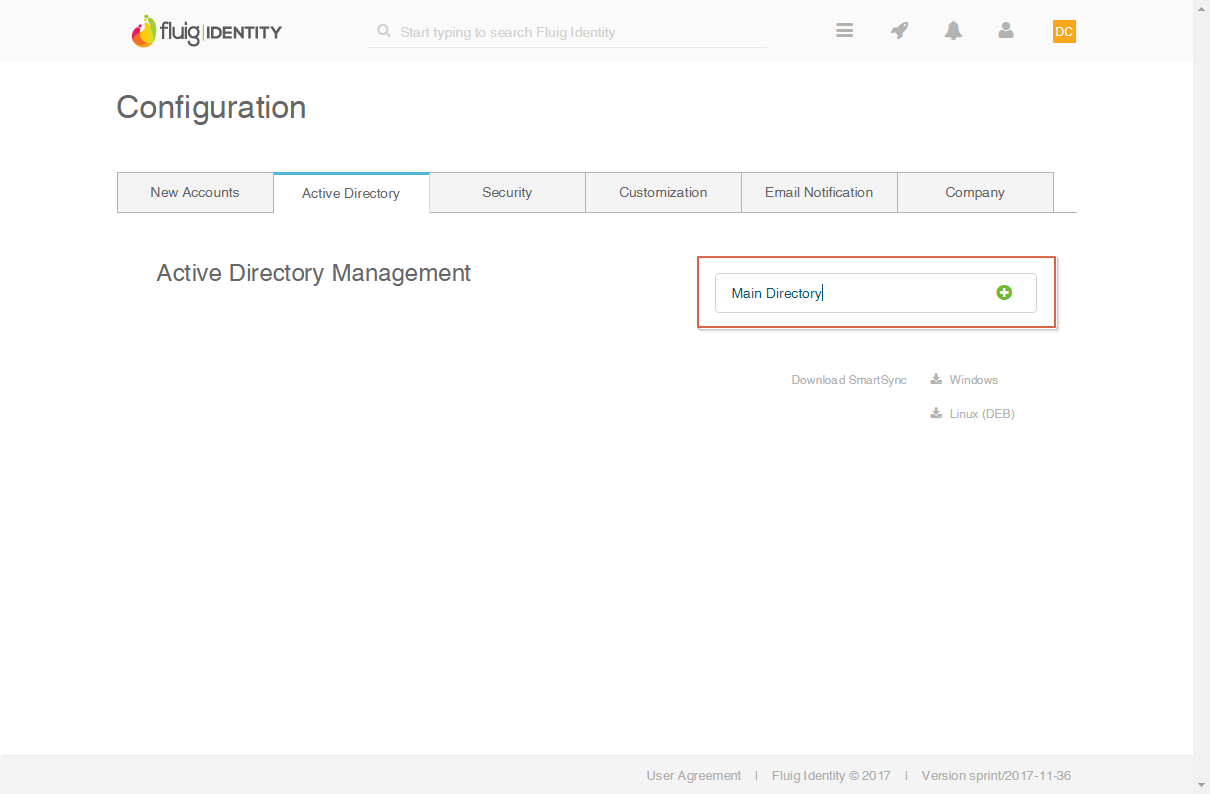
- Associate a new AD by entering its name in the field Link New Active Directory and clicking the icon
 . .
|
- Copy the token in the pop-up window after adding the new AD.
A token is a key that connects an Active Directory domain to the associated AD (Step 1), allowing you to synchronize users of an AD server for your company's context on fluig Identity. Each AD on fluig Identity has its own token, which is generated when the AD is associated. |

|
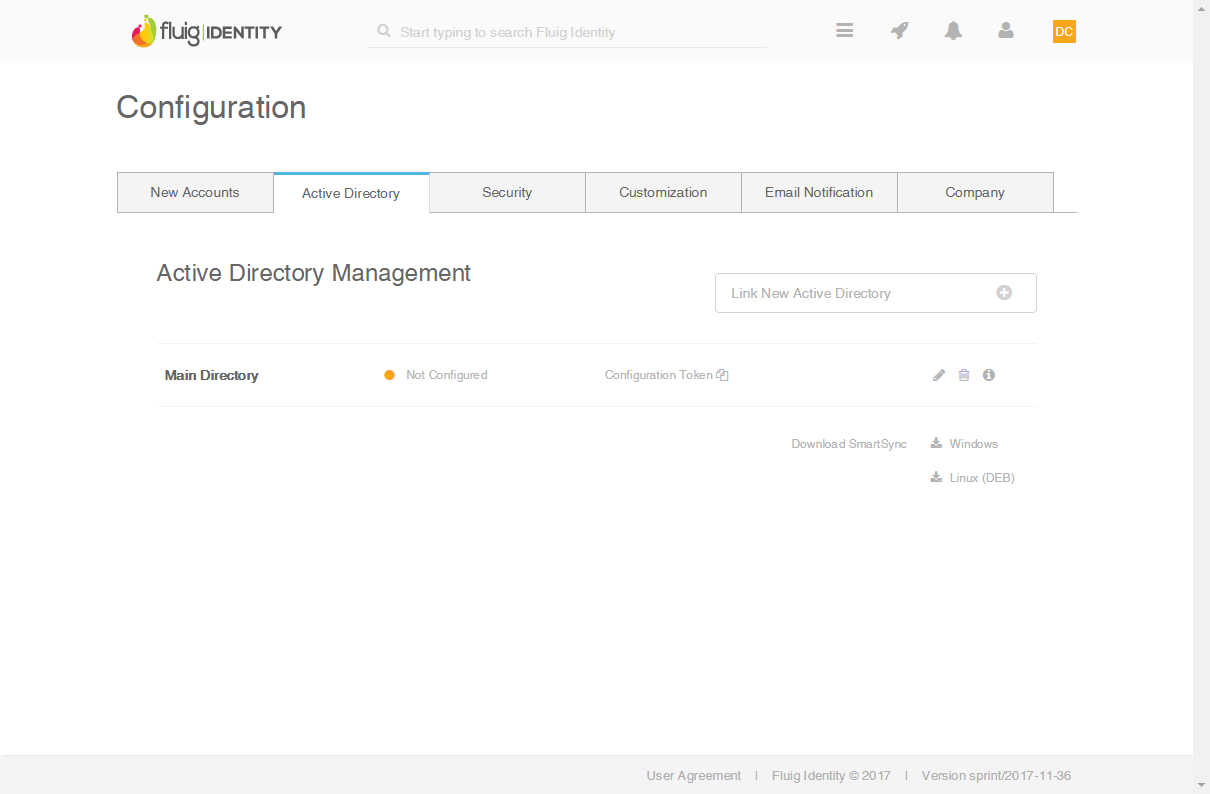
After you associate a new Active Directory, the status Not configured is displayed.
|
|
SmartSync configuration 
The purpose of this topic is to show how to configure SmartSync.
SmartSync Control Panel Overview When SmartSync is running, the service constantly monitors the configured LDAP directory if new users are created or there are changes to the status of the existing users. If there are changes to the synchronized information in the AD synchronized instance, they will be reflected on fluig Identity. As of SmartSync version 3.0.0, in addition to integration with Active Directory, integration with Open LDAP is also available. To configure a domain to be synchronized with Identity, click the Configure button. 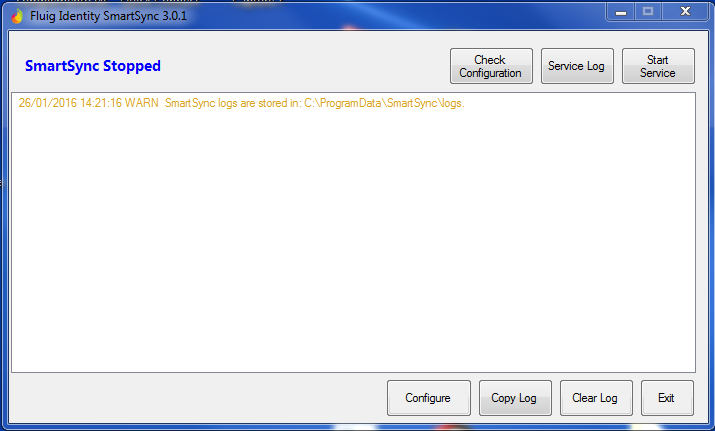
|
- Go to the FluigIdentity Server tab. That is where you can start configuring SmartSync, by entering the fluig Identity server address.
- Choose either the TLS or SSL protocol to connect. The default for the production server is TLS.
- In the ADSync Interval Syncronism field, enter the interval (in seconds) for SmartSync to activate the ADSync service and search LDAP commands on fluig Identity. We recommend changing this field only in environments that have limited internet connections. The default time is 1 second and the maximum time is 5 seconds.
- After configuring it, click Save and check if the server where SmartSync is installed can connect to the fluig Identity address.

|
- To configure the domain, provide some information about your Active Directory server:
Field | Description |
|---|
Address Directory Server | Server address. URL, or domain name and port. Example: LDAP://192.168.59:389 | Root DN | Root domain. Base DN or first level. | User Name and Password | LDAP administrator login and password. The user entered in this field must necessarily be the domain administrator. |
| Token | Value configured in Identity, identifying with which directory this domain will integrate. | Type Ldap | Domain type (Active Directory or OpenLDAP). | Interval Synchronism (Seconds)
| Enter (in seconds) the interval to synchronize the changed LDAP directory information to be updated on Identity. | User Filter | Filter is a search language in the LDAP directory. This configuration is used for performing the initial import of users only. By default, it is set to import only users that have provided their e-mail addresses. | Enabled | It is used for enabling or disabling the integration between the Directory and Identity. |
- After entering all the information, click Save. If the information is correct, the domain will be successfully configured. Otherwise, it displays a message showing why the domain cannot be configured.
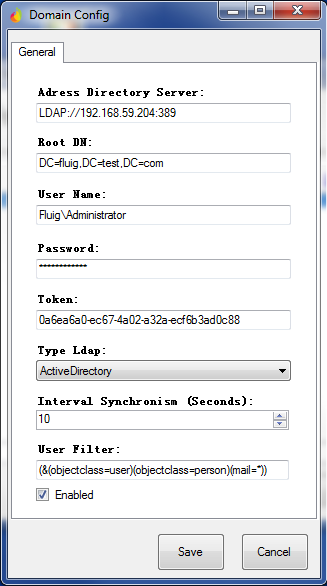
Active Directory or OpenLDAP domain setup screen As SmartSync is a 32-bit app, the memory used by the program must not exceed 2 GB, otherwise it will impair its performance. To prevent that, we recommend you do not configure more than one LDAP domain per server. |
|
The procedures outlined in this tab are required only for installations that use OpenLDAP domain. For environments that use Active Directory, you can disregard the steps below. |
- As of SmartSync version 3.0.0, it can also be integrated with OpenLDAP. That way, Open LDAP users can be imported to fluig Identity. OpenLDAP Software is an open source implementation of Lightweight Directory Access Protocol. (http://www.openldap.org/)
- As OpenLDAP is configurable, you are required to enter some properties to perform the import or synchronization with fluig Identity.
- In order to use SmartSync with an OpenLDAP directory, the Domain Config Type Ldap must be set as OpenLdap.
Property | Description |
|---|
User Status Enable | Property Ldap | Open LDAP property name when the user is active. | Type Property | Enter Open LDAP value type. It can be Boolean, integer or string when the user is active. | Value Property | Open LDAP property value when the user is active. | User Status Disable | Property Ldap | Open LDAP property name when the user is inactive. | Type Property | Enter Open LDAP property value type. It can be Boolean, integer or string when the user is inactive. | Value Property | Open LDAP property value when the user is inactive. |

|
- The Windows Authentication Service must be set to 0.
|
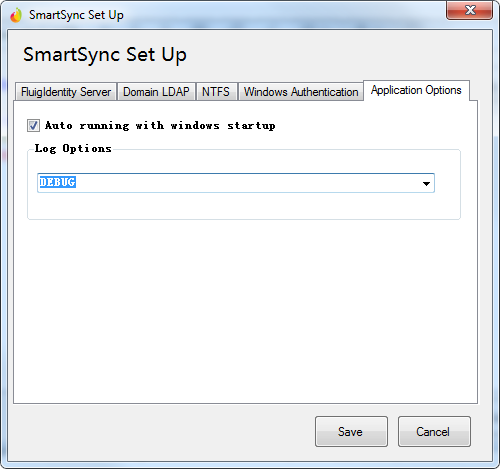
- SmartSync offers auto-start options with Windows and information record (logging).
- In order to allow SmartSync to be activated when the server starts up, enable the option Auto running with windows startup.
- In order to configure the type of information to view in the log console, select one of the four options available.
- DEBUG is the most detailed option, as it displays the records of the other three options in addition to specific information.
- For more detailed information about some types of log records, double-click a line in the log console. A separate window will be displayed.
|
|
