Histórico da Página
Index
| Índice | ||||||||
|---|---|---|---|---|---|---|---|---|
|
Speaking of
...
content...
Contents are Content is videos, picturesimages, presentations, and text documents , – among others , that – which can be used in training sessions and classes.
The content Content may be:
- public: a public content is available to be used in trainings for use in training sessions and classes for by all users;
- private: private content is only available only to the user who registered it.
The types of content that can be registered are:
- image (with the extensions gif, jpeg, bmp , and jpg, among otherspng files);video
videos (with
the extensionswmv1, avi and mp42 extensions, or YouTube, Vimeo and Kaltura videos registered from their URL);
Nota title Notes 1 → Currently the vwm extension is only supported by Internet Explorer. As of Google Chrome version 45 and Mozilla Firefox version 55, the NPAPI plugin that generates that view was inactivated.
2 → Except for encoded mp4 files in H.263, XVID or Divx formats.
- audio (with mp3 extension, flv, mp4, among others);
- file (with the extension txt, pdf , and Microsoft Office extensions, among others));
- link to external content – URL – such as videos, pages, articles, etc.;
- SCORM 1.2;SCORM created on the Elucidat tool when there is active integration between it and the platform. More details are available in Integration with Elucidat..
| Informações | ||
|---|---|---|
| ||
Only content with the extensions GIF, JPG, JPEG, BMP, PNG, WMV1, AVI1, MP41, MP3, TXT and PDF and SCORM content can be viewed in the internal viewer. All other contents are downloaded when viewed. 1 → These extensions have some limitations. More details in “Which video formats are supported as content?” and “Why is content with AVI extension not shown in the Chrome and Firefox browsers?” |
SCORM 1.2 refers to a compressed file that should must contain an XML file with the name "imsmanifest.xml" called "manifest" file named “imsmanifest.xml” in its root directory, known as the “manifest” file. The “manifest” file "manifest" contains all necessary information required for the content presentation. The manifest divides the training or the content in into one or more SCORMs.
The SCORMs can be combined in a tree structure that represents the content or training, known as activity tree. The "manifest" “manifest” contains a structure, in the XML file, representative of representing the activity tree, as well as information on how to launch each SCORM and, optionally, metadata that describe describing the training or contents the content and its parts.
The registration of contents is done by the Contents is registered by users who have permissions to manage contentscontent, that is, users that either have permission to create, change, removedelete, or view, or users that have full permission.
The actions related to the management of contents Content management actions are:
- create/change content: with this type of permission , it is possible to register and edit personal content and content defined allows registering new content, editing both the managed content and the content set as public;
- manage all content: the user with permission can this permission allows users to create and edit public or /private content of from other users;
- remove delete content: the user who owns this kind of permission can remove contents that are not in usepermission allows users to delete content that is no longer used;
- view content: having this permission , the user can only view existing content and only allows users to view available content, but they cannot perform any other action on themsuch content.
Basic path
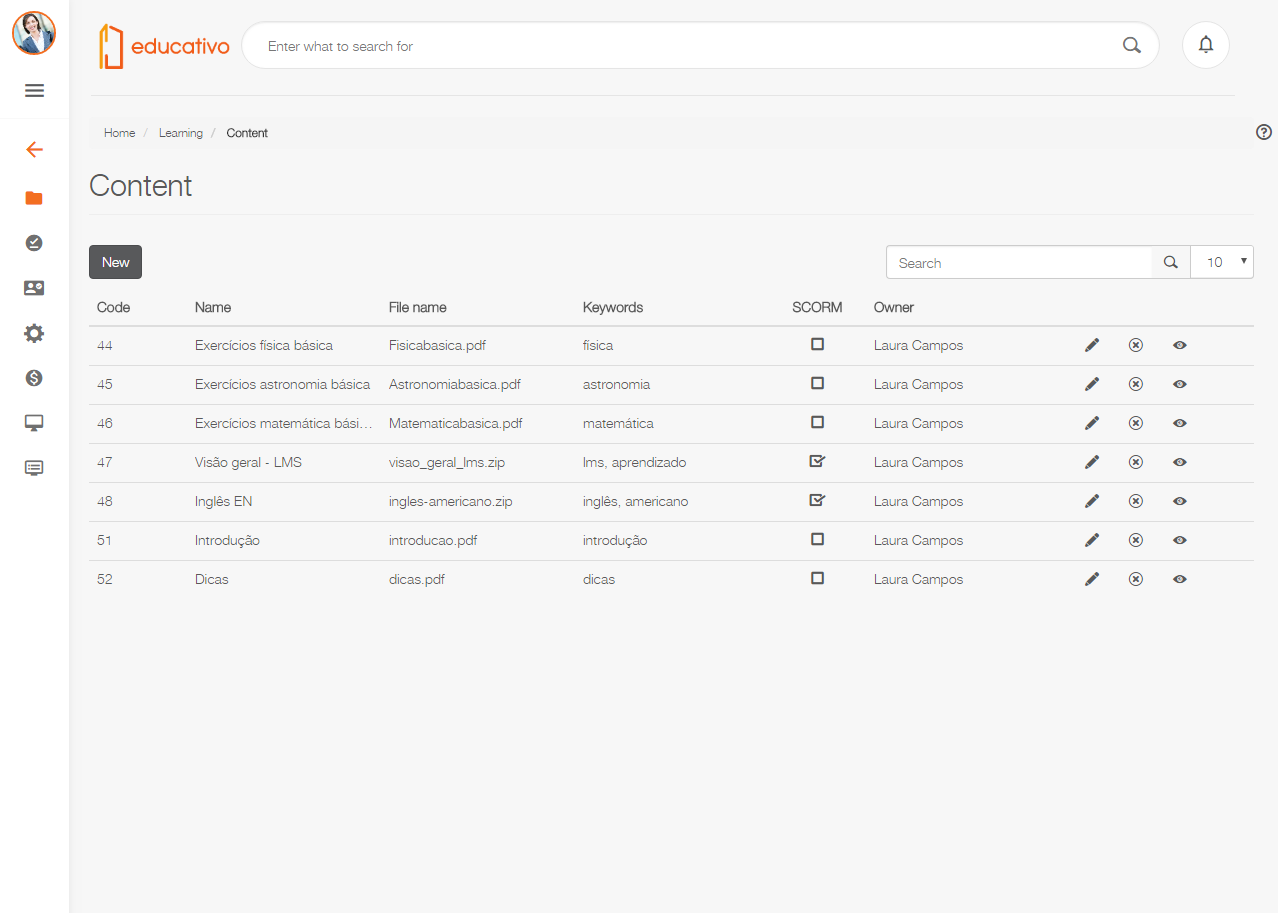
View contents
...
...
01. In In the main menu, place the mouse over Learning.
02. Click Click Manage.
03. View existing contentsavailable content.
Alternative paths
Filter contents
Add content
...
01. Click New, 01. Click Filter options, located in the upper left corner of the window.
02. Enter the name of the content to be searched.
03. Press Search. To undo the filter set and view all contents again, press Clear.
04. View contents according to defined filter.
Add content
01. Press New.
02. Enter the requested information to the content Enter the required content information.
| Painel |
|---|
The requested Required information are: Name Keywords Turn private use content to the user owner Description Set the content for private use of the owner |
03. Click the Upload tab (to add content from a local machine) or the URL tab (to add a link to external content).
04. If you clicked the Upload tab, then click Load file.
05. Find and select the content of your choosing.
| Painel |
|---|
| To delete an added file, simply click Delete. |
06. Define the remaining information, if relevant to the uploaded content.
| Painel | ||
|---|---|---|
It is SCORM content SCORM Version
File Do not validate SCORM content Nota | | title | Please note
07. If you click the URL tab, enter its web address.
| Painel | |||||
|---|---|---|---|---|---|
You can enter URLs of YouTube and Vimeo videos in various formats. If it is a Kaltura video, enter its full URL.
The videos stored in these three platforms are displayed in their own internal player when viewed in training courses. The other URLs are displayed in a new tab. |
08. Click 03. Press Save; or Cancel to quit adding the inclusion of content.
Edit content
...
...
01. Select In the Content window, find the content to be edited.
02. Press Edit Click the Edit icon, located to the right of the line corresponding to the content.
03. Change Change the chosen information . Find information of your choice. For more details about the displayed fields in , see the alternative path Add Contentcontent.
04. Press Click Save, or Cancel to discard the changes made.
Remove content
Download the content
...
01. In the Content window, find the content to be downloaded.
02. Click the Edit icon, located to the right of the line corresponding to the content.
03. Click Download file, located next to the name of the file corresponding to the content.
Delete content
...
01. In the Content window, find 01. Select the content to be excludeddeleted.
02. Press Remove Click the Delete icon, to the right of the line corresponding to the content.
03. In In the pop-up message displayed, press click Yes to confirm deletion of the content removal; , or Cancel to quit cancel the action.
Preview content
...
01. Select In the Content window, find the content to be previewed.
02. Press Preview Click the Preview icon, located to the right of the line corresponding to the content.
03. View View the selected content. To To close the preview mode and return go back to the main content window, click click Close Previewpreview.
| Painel |
|---|
| When pressing previewpreviewing, Office suite files will be are downloaded automatically, as they are not rendered by the fluig’s internal viewer. |
...
| Informações | ||
|---|---|---|
| ||
This documentation is valid from the 1.6.1 3 – Snowflake update. If you use a previous update, it may contain information different from what you see on your platform. |
...
Visão Geral
Import HTML Content
Conteúdo das Ferramentas
Tarefas